Introduction
PQC road construction has its own rhythm. There is a fixed order to the layers, a fixed sequence to the work, and very little room to improvise once the concrete starts flowing. A contractor who understands that rhythm runs a smooth site. One who does not ends up chasing problems.
Pavement quality concrete, or PQC, is the riding surface of a rigid pavement. It is the layer that carries traffic, and it sits on top of a carefully built foundation. Building it well is less about any single clever trick and more about doing each step in the right order with the right materials, equipment, and accessories ready on time.
This guide takes the whole job from the ground up. It explains the layer structure, lists what you need to have on site, and then walks through the construction sequence the way it actually happens.
What Is PQC Road Construction?
PQC road construction is the process of building the concrete riding slab of a rigid pavement using pavement quality concrete laid over a prepared foundation. PQC is a high strength concrete made with well graded aggregates and designed to meet the flexural strength that road traffic demands.
Unlike a bitumen road, which flexes under load, a PQC slab is rigid. It spreads wheel loads over a wide area and passes only a small pressure down to the layers below. That rigidity is why concrete pavements last so long, and it is also why the foundation and the joints have to be built with care. The slab can only perform if everything under it and around it is correct.
PQC work in India is guided mainly by IRC:15, the code of practice for construction of jointed plain concrete pavements, along with the MoRTH specifications for road and bridge works.
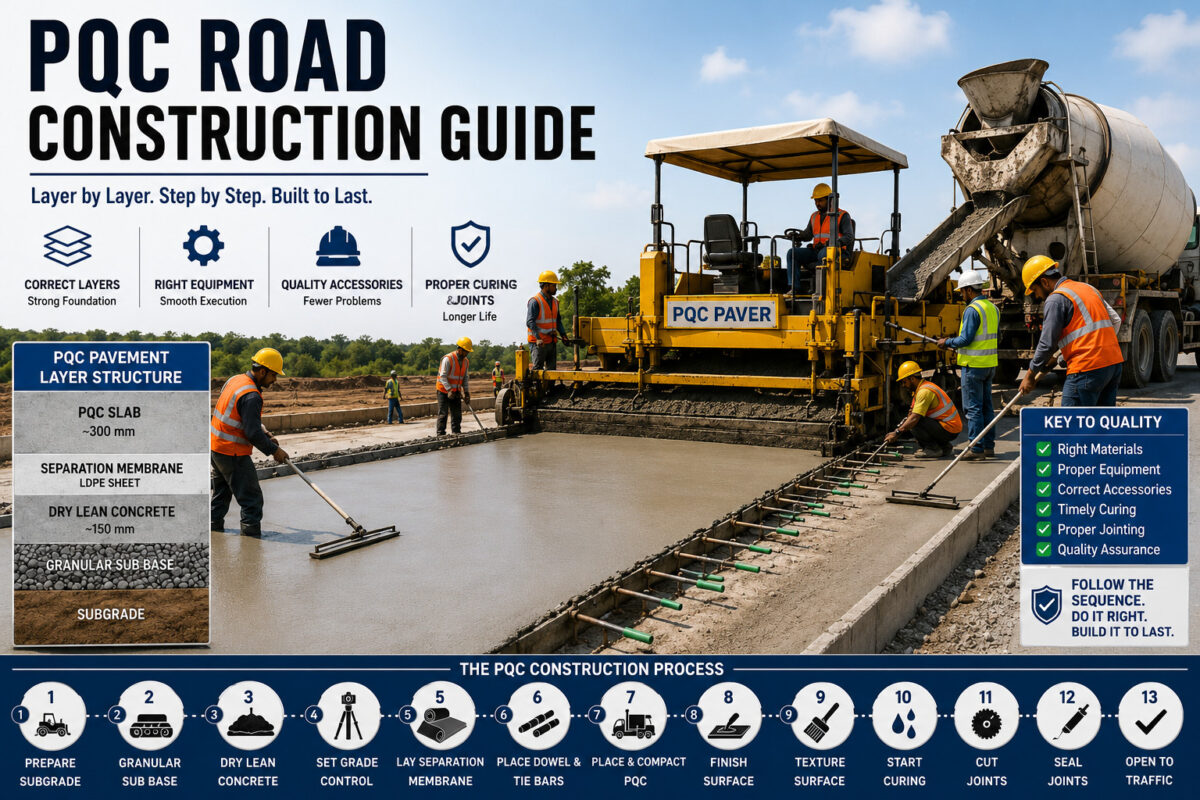
The Pavement Layer Structure
A rigid pavement is built up in layers, each with a job. Understanding the stack makes the construction sequence obvious.
| Layer | Typical Role | Notes |
| Subgrade | The compacted natural soil foundation | Must be stable and well compacted |
| Granular sub base | Drainage and a working platform | Built and compacted to level |
| Dry lean concrete (DLC) | A firm, uniform base for the slab | Aggregate to cement ratio limited as per MoRTH |
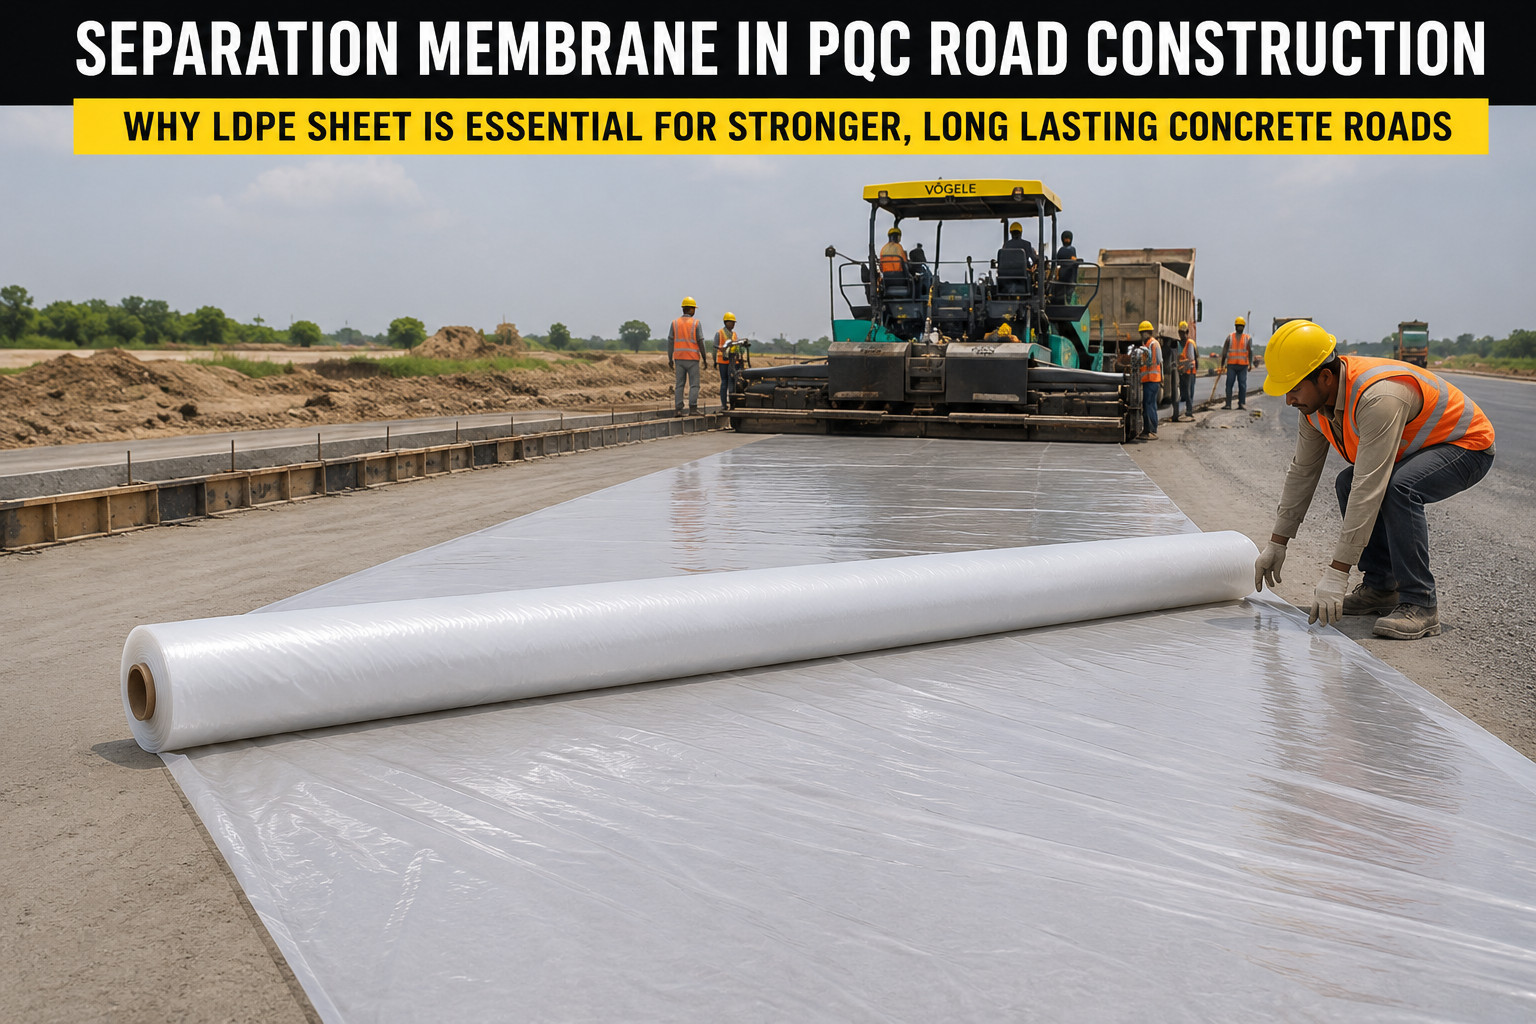
| Separation membrane | A debonding layer between DLC and PQC | Impermeable LDPE sheet |
| PQC slab | The concrete riding surface | Commonly around 300 mm thick |
The PQC slab is commonly close to 300 mm thick and the DLC around 150 mm, though exact thicknesses come from the pavement design. Between the DLC and the PQC sits the separation membrane, a thin impermeable sheet that lets the slab move freely. Each layer must be accepted before the next begins.
Materials Required for PQC Road Construction
The concrete mix is only as good as what goes into it. The core materials are:
• Cement: of the approved grade and type, stored dry and used in date order.
• Coarse aggregate: that is hard, clean, well-graded, and of the right maximum size for the slab.
• Fine aggregate: that is clean and correctly graded.
• Water: that is clean and fit for concreting.
• Admixtures: such as plasticizers or retarders, used to control workability and setting in line with the mix design.
• Steel: for dowel bars and tie bars, plain round for dowels and deformed for tie bars.
• Curing materials: including curing compound and hessian or other approved covering.
Fibres are sometimes added to improve crack resistance in specific applications. Where the design calls for it, PPE fiber or glass fibre may be specified, and these should be dosed strictly to the mix design.
Equipment Required for PQC Road Construction
PQC work is equipment-heavy. The main machines and tools on a typical site include:
• A concrete batching plant to produce a consistent mix.
• Transit mixers or tippers to deliver concrete without segregation.
• A slipform or fixed form paver to place, compact, and shape the slab.
• Needle vibrators and screed vibrators for compaction, with needle vibrators reaching into the mass and screed vibrators working the surface.
• A power trowel for finishing work where a smooth, dense surface is needed.
• A groove cutting machine fitted with the correct blade for cutting joints.
• A bandsaw machine for cutting and preparing steel bars accurately.
• Survey instruments for setting line and level.
Each machine has to be available and serviced before the pour, because concrete will not wait for a breakdown.
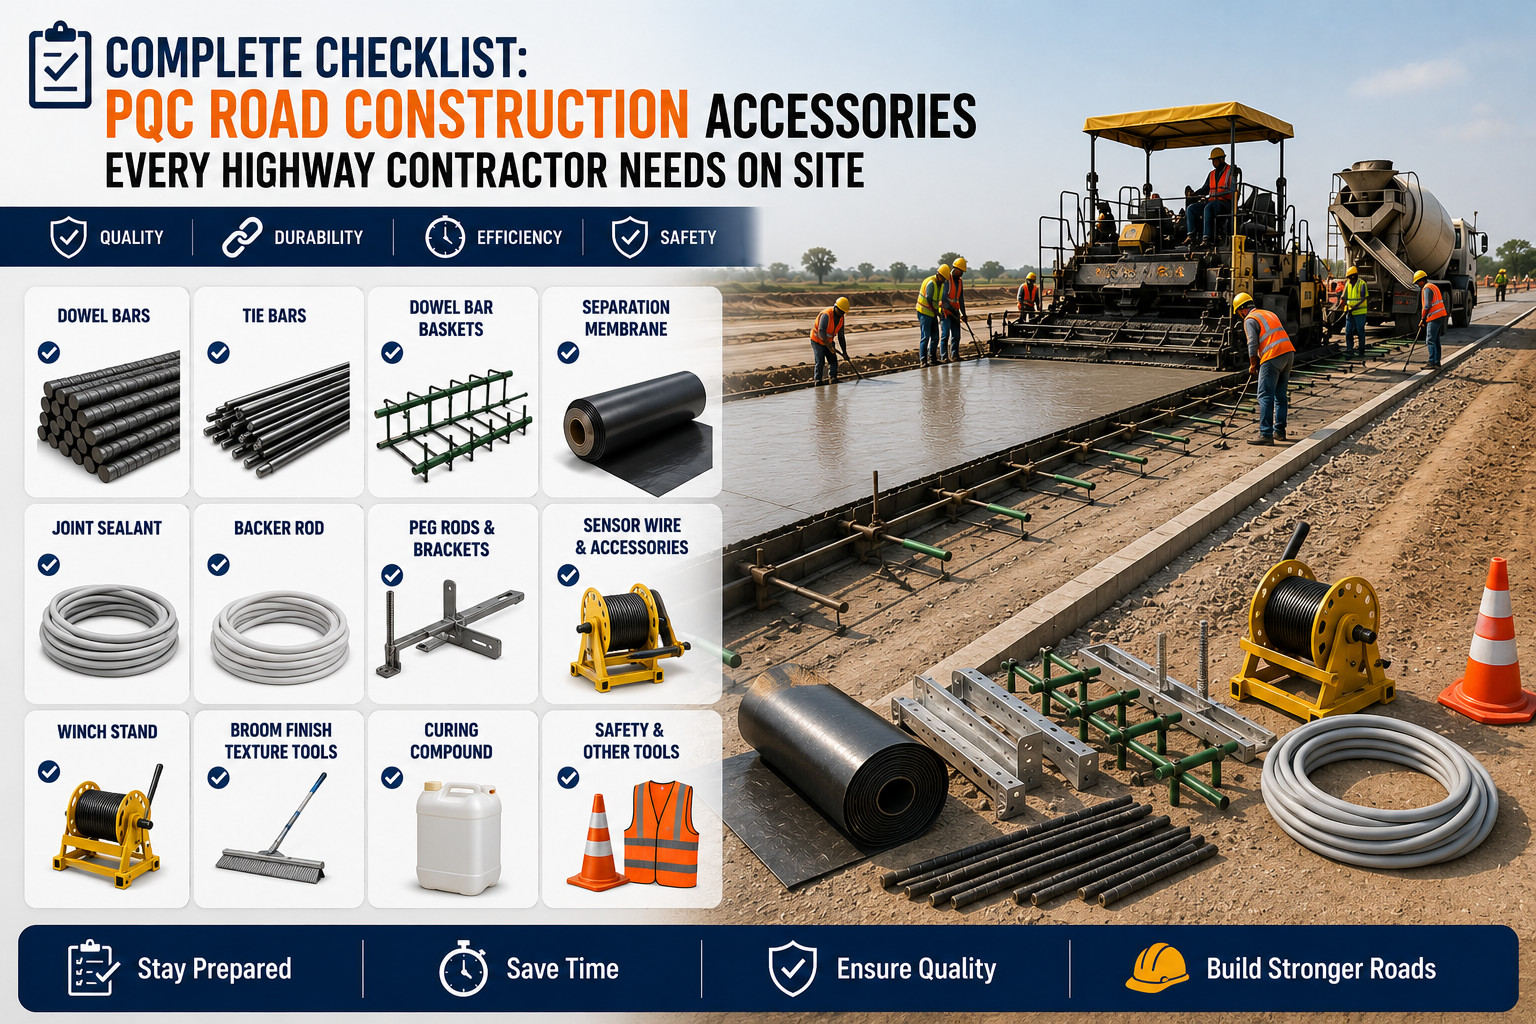
Accessories Required for PQC Road Construction
Accessories are the small items that quietly make the slab correct. They are easy to underestimate and expensive to forget. The key ones are:
• Separation membrane, the LDPE sheet laid over the DLC.
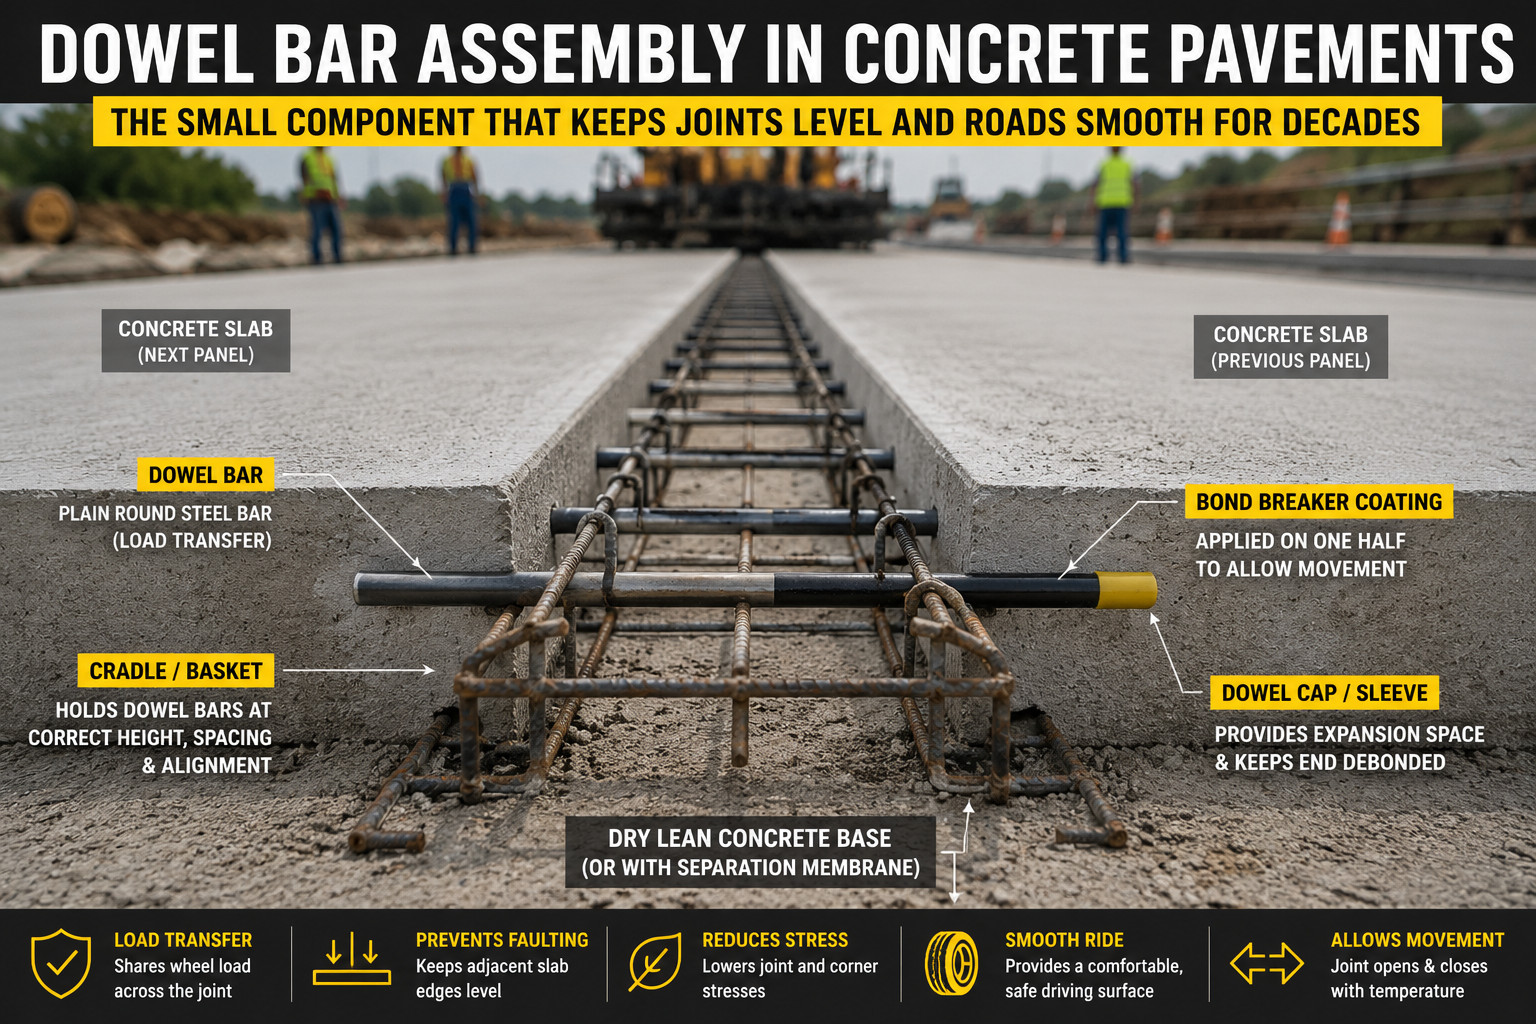
• Dowel bar sleeves and caps for the assemblies at transverse joints.
• Peg rods to support the string line for grade control.
• Sensor wire that the paver follows for line and level.
• A winch stand to tension the string line correctly.
• A concrete floater for hand finishing.
• A texturing brush to give the surface its final skid-resistant texture.
• Expansion joint board for the compressible filler at expansion joints.
• Groove cutting blades matched to the slab.
• Sealant and primer, backer rod, and crack repair materials for sealing joints and treating any cracks.
• DWC pipe where cross drainage or duct provision is needed.
Having these accessories on site, in the right quantity, before paving begins, is part of good planning. Running short of any of them mid pour creates problems that show up in the finished slab.
Step by Step PQC Road Construction Process
1. Prepare and accept the subgrade: Compact the natural soil foundation to the specified density and check the level.
2. Build the granular subbase: Lay and compact the granular layer to line and level, creating a sound working platform.
3. Lay the dry lean concrete: Place and compact the DLC to a firm, uniform surface, then cure it. The DLC must be accepted before paving.
4. Set the grade control system: Drive peg rods, run the sensor wire string line, and tension it with a winch stand so the paver has an accurate reference for line and level.
5. Lay the separation membrane: Clean the DLC, then roll out the LDPE sheet flat with correct overlaps just ahead of the paver.
6. Place the dowel and tie bar assemblies: Set dowel bar cradles across transverse joints and tie bars at longitudinal joints, checking alignment carefully.
7. Place and compact the PQC: Deliver concrete, then place, compact, and shape it with the paver. Use needle and screed vibrators to remove voids without causing segregation.
8. Finish the surface: Use the concrete floater and power trowel as required to close and level the surface.
9. Texture the surface: Draw a texturing brush across the fresh slab to create the skid-resistant texture before the concrete stiffens.
10. Start curing: Apply the curing compound after the surface has set enough, then cover with hessian and keep it continuously moist. Curing typically continues for 14 days.
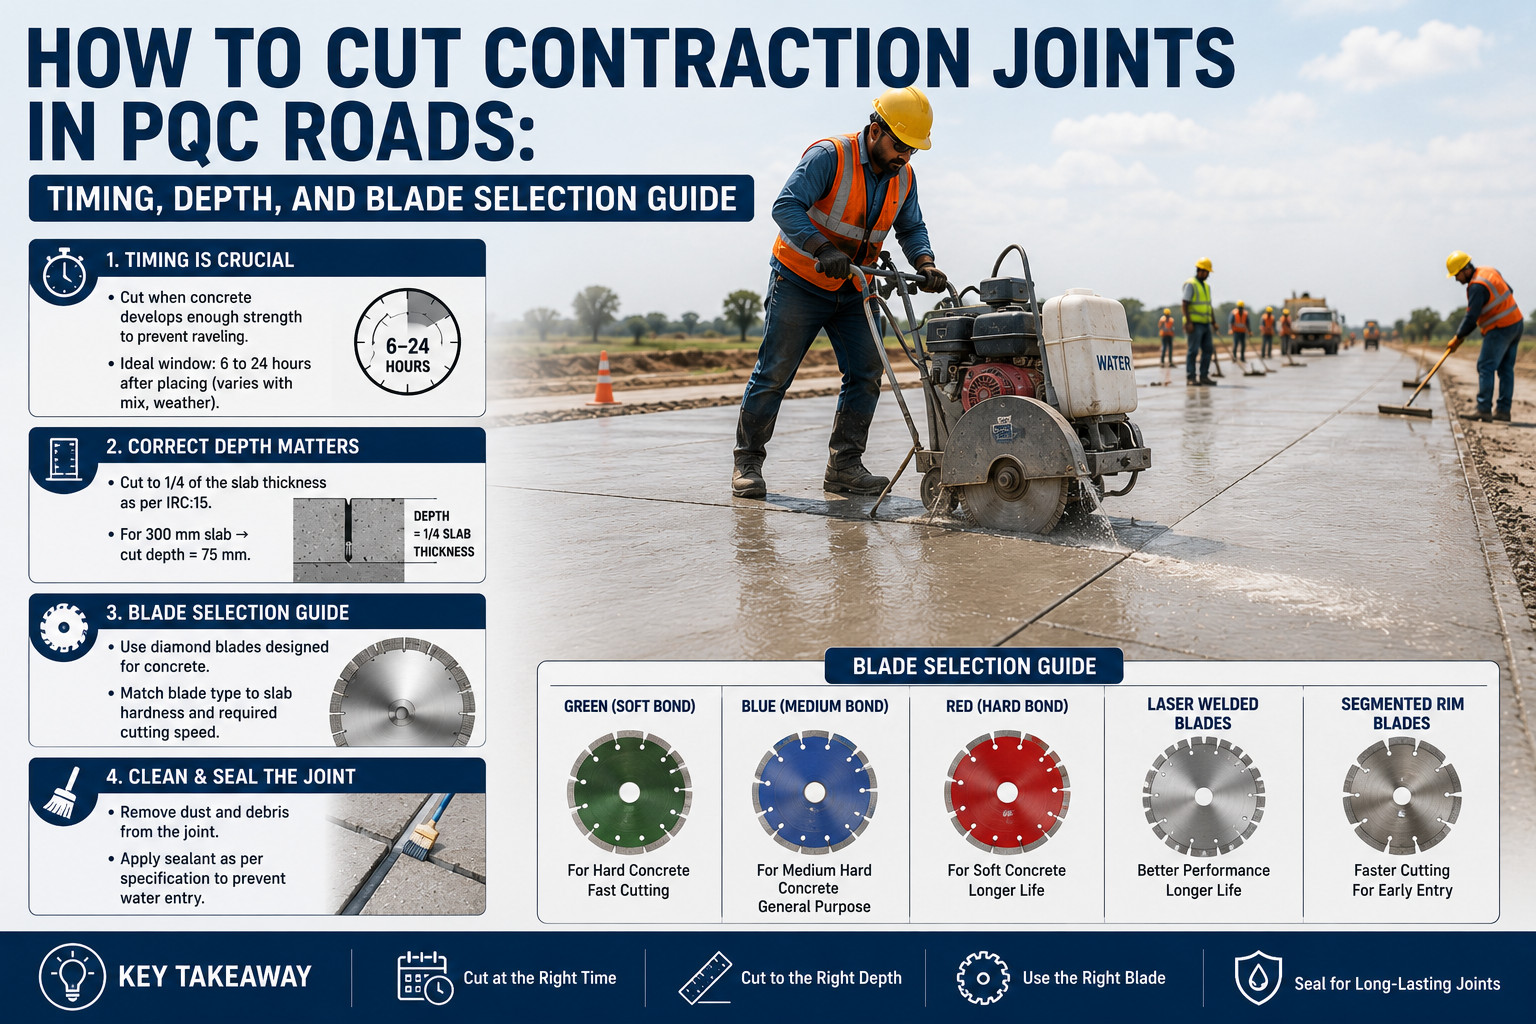
11. Cut the joints: Once the concrete has gained enough strength, use the groove cutting machine to saw the contraction joints to the correct depth and timing.
12. Seal the joints: Clean the joint grooves, place backer rod where needed, prime the faces, and apply joint sealant. Treat any cracks with the appropriate crack repair materials.
13. Open to traffic: Open the pavement only after the concrete has reached the strength the specification requires.
Common Mistakes to Avoid
• Starting a layer before the one below is accepted: Every layer depends on the one under it.
• A poorly set string line: A sagging or loose string line puts waves into the finished surface.
• A dirty DLC under the membrane: Dust and debris create friction points and puncture the sheet.
• Skewed dowel bars: Misaligned dowels lock joints and cause cracking.
• Weak compaction: Under-vibrated concrete leaves voids and weak spots.
• Late or short curing: Curing that starts late or stops early leads to surface cracking and low strength.
• Joints cut at the wrong time: Cutting too early ravels the edge; too late invites random cracks.
Best Practices for PQC Road Construction
• Plan materials, equipment, and accessories so everything is on site before paving day.
• Treat the acceptance of each layer as a formal hold point.
• Set and tension the grade control string line carefully and recheck it.
• Keep the separation membrane placement as a rolling operation just ahead of the paver.
• Inspect dowel and tie bar alignment before every pour.
• Compact thoroughly but avoid over-vibration and segregation.
• Start curing promptly and keep it continuous for the full period.
• Cut joints within the correct timing window and to the specified depth.
• Keep spares of critical accessories so the pour never stops.
Conclusion
PQC road construction rewards order and preparation. The layers go down in sequence, each one accepted before the next, and the slab is only as good as the foundation and the joints that support it. There is no shortcut around that.
The contractors who run clean PQC sites are the ones who plan. They have the materials tested, the equipment serviced, and every accessory from the separation membrane to the joint sealant on site before paving day. They treat curing and joint cutting with the same respect they give to the pour itself. Follow the sequence, keep the accessories ready, and a PQC road will give decades of strong, low-maintenance service.
Frequently Asked Questions
What is PQC in road construction?
PQC stands for pavement quality concrete. It is the high-strength concrete riding slab of a rigid pavement laid over a dry lean concrete base. PQC carries traffic loads and spreads them over a wide area through the rigidity of the slab.
What are the layers of a PQC road?
A PQC road is built up as subgrade, granular sub base, dry lean concrete, a separation membrane, and the PQC slab on top. Each layer is built and accepted before the next one starts.
What is the difference between DLC and PQC?
DLC, or dry lean concrete, is a low-cement-content base layer that gives the slab a firm, uniform support. PQC is the high-strength concrete riding surface laid above it. DLC supports; PQC carries traffic.
What accessories are needed for PQC road construction?
Key accessories include the separation membrane, dowel bar sleeves and caps, peg rods, sensor wire, a winch stand, concrete floater, texturing brush, expansion joint board, groove cutting blades, and joint sealing materials.
How thick is a PQC slab?
A PQC slab is commonly around 300 mm thick, with the DLC base around 150 mm, although the exact thickness is set by the pavement design based on traffic and subgrade conditions.
How long is PQC cured?
PQC is generally cured continuously for about 14 days. A curing compound is applied after the surface sets, and the slab is then kept moist, often under damp hessian, for the full curing period.
Which code governs PQC road construction in India?
PQC road construction in India is guided mainly by IRC:15, the code of practice for the construction of jointed plain concrete pavements, together with the MoRTH specifications for road and bridge works.
When can a PQC road be opened to traffic?
A PQC road is opened to traffic only after the concrete has reached the strength required by the specification. Opening too early risks damage to a slab that has not yet developed full strength.
Related Blogs
Complete Checklist: PQC Road Construction Accessories Every Highway Contractor Needs on Site
Dowel Bar Assembly in Rigid Pavement: Sleeves, Caps, and Correct Installation
Separation Membrane in PQC Roads: Why LDPE Is the Standard Choice